


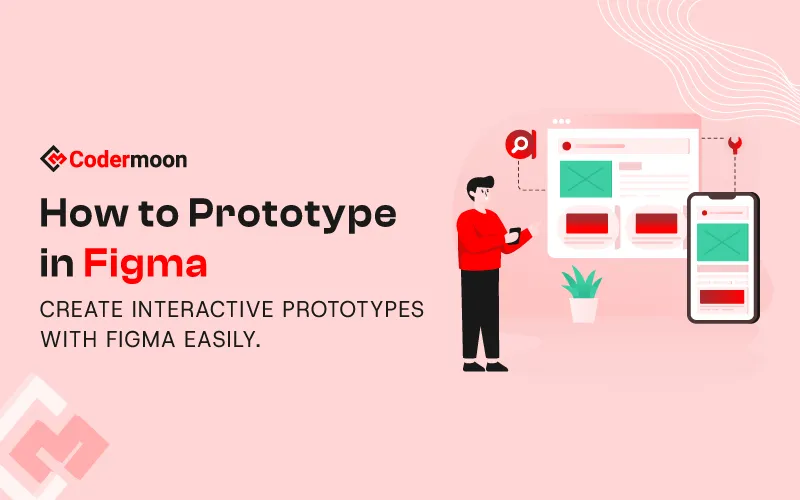
Interactive prototypes are an efficient way to test and refine user experiences before development begins. Figma prototypes let you build interactive flows that show how users move through your design. But how to prototype in Figma?
You can start by opening the Prototype tab. Then select a starting element, connect it to another, and set triggers and actions. Finally, click Present to test your interactive design. Preview it and iterate as needed.
With that being said, let’s get deeper into prototyping in Figma.
Key Takeaways:
- In Figma, a prototype is an interactive model of your design that simulates how the final product will work.
- Start by designing frames with consistent layouts, components, and realistic content for accurate prototypes.
- Switch to Prototype mode and set flows. Finally, connect hotspots to build seamless user interactions.
What is Prototyping in Figma?
Figma prototype converts static design frames into interactive mockups. You simulate user interactions and flows by connecting screens and defining triggers.
It is likely a working representation of your design that simulates functionality and user flow. This creates a realistic model of your product to let you see how it behaves before development.
The purpose is to bridge the gap between your ideas and the final experience.
How to Create a Prototype in Figma
This beginner-friendly Figma prototyping tutorial will guide you from your first frame to polished interactions.
Step 1: Design Your Frames
First off, start by creating frames that represent each screen of your app or website. Choose device dimensions that match your target, like iPhone, Android, or desktop.
Once you set the size, keep your frames consistent with spacing, typography, and color. From there, build components for elements you reuse often, such as buttons or headers.
Next, add variants to show different states, like hover or active, so your prototype feels natural. Organize layers clearly because a clean structure makes connections easier later.
Replace placeholder text and boxes with realistic content to see flows in action. Treat each frame as a real, working screen.
Step 2: Switch to Prototype mode
Now, switch to Prototype mode to start building interactions.
For this, simply click the Prototype tab beside Design in the right panel. You can also press Shift + E to toggle instantly. Once active, you see options for flows, interactions, and connections.
Select any frame or object, and the blue node appears for linking screens. You keep the Design tab closed since you will jump back often.
This switch moves you from creating static layouts to shaping user journeys.
Step 3: Flows and Starting Points
In Figma, you need to organize a prototype around flows. Here, each flow represents a network of frames and connections on a single page.
You can map an entire user journey or focus on a segment such as account creation or checkout. Once you drag your first connection between two frames, Figma assigns a starting point automatically.
If needed, you can also add one manually by selecting the frame and clicking the plus sign in the Flow Starting Point section.
Each flow needs its own name, description, and starting point. You name it, and edit the description through the sidebar.
And you can easily remove a starting point. Just Delete under Flow Starting Point. You can nest multiple flows within one page, but each top‑level frame can only have one starting point.
Step 4: Create Connections
Now, at this stage of the Figma prototype tutorial, we’ll create a connection. Start by selecting the hotspot in your starting frame.
Click the little node that appears to create the link. Drag that node to your destination frame. If you are connecting for the first time, just rest assured.
Figma makes the first frame the starting point. You’ll find the connection has three parts: the hotspot, the noodle that stores interaction details, and the destination.
Choose hotspots that highlight user actions like buttons or icons, because they become clickable in prototype mode. After connecting, Figma shows an Interaction details panel where you pick triggers and animations.
If needed, you can select several hotspots and drag them to the same frame. It creates multiple connections in one gesture.
Step 5: Create Interactions and Animations
Interactions are the heart of any Figma prototype. They connect two layers and define how a user moves through your design.
Each interaction includes a trigger, an action, and an animation. You can keep interactions simple with instant transitions or create richer movement with animated elements.
i) Set interaction details
After linking frames at step 2, configure the interaction details in the right panel. Choose a trigger that fits the user behaviour.
For example, “On click” for buttons or “On drag” for draggable elements. Select an action that matches your intent, like “Navigate to” when moving between screens or “Open overlay” for pop‑ups.
ii) Apply an animation
Pick an animation style that matches the interaction. Instant animations do not move and work best for simple transitions. Also, you can choose-
- Dissolve fades from one screen to another.
- Move in/out, push, and slide to add motion in specific directions.
- You can finetune these animations with easing curves and timing.
- Easing curves define the speed of the movement at the beginning, middle, and end; an “ease in” starts slowly, then speeds up.
For example, if you are creating an auto‑scroll interaction, increase the duration from 300ms to 600ms to get a softer feel.
If you open a menu drawer with a move-in animation, the corresponding close action will automatically mirror the settings with a move-out animation.
ii) Preview your animation
After configuring interactions, preview them in Presentation mode. Click the Present icon in the upper right corner. Interact with your prototype as a user would.
Share the entire prototype or copy a link to a specific flow to get feedback. Use this testing phase to refine your triggers, actions, and animations until the flow feels smooth.
Step 6: Add Overflow Scrolling
Use overflow scrolling when you want to scroll within a frame. Select a frame with content extending past its edges. Then choose horizontal, vertical, or both in the Prototype panel.
Step 7: Use Interactive Components
After you’ve configured flows, interactions, and overflow scrolling, interactive components let you reuse those interactions across variants.
You define interactions and animations in a component set, and each instance inherits them. Turn on Clip Content to hide overflow edges and create scrollable carousels or menus. This reduces the number of screens and simplifies wiring.
In the Interaction Details panel, pick the “Change To” action to switch between variant states.
Examples include —
- Checkbox: On click, you toggle between default and selected, then return to default on the next click.
- Button: Hover over a button to show a hover state; click to display the pressed state; after a short delay, it resets.
- Toggle: Click a switch to move between On and Off states with a smooth animation.
- Dropdown: Click a dropdown to open the menu; selecting an item closes the menu without extra frames.
Step 8: Preview and Present Your Prototype
To preview, open the presentation tab in Figma. Then choose a device mockup for context. Click the Present icon next to your flow or in the toolbar to test your interactions.
You can switch flows from the sidebar, mention teammates in comments, and gather feedback. During preview, click through your prototype to navigate and test flows.
Step 9: Share Prototype
After previewing your prototype, click “Share Prototype” in the presentation toolbar. Choose “can view prototypes only” to limit access to the prototype and keep the design file private. Share the link with teammates or stakeholders.
They can interact with the prototype and leave comments. You can choose to let them view and comment, but not edit.
For any confusion or a detailed overview, you can check out this effective video:
Why Prototype in Figma Matters?
Prototypes in Figma transform your ideas into interactive experiences quickly. You test designs early, refine them efficiently, and collaborate seamlessly across devices.
Interactive Flows
Figma prototypes let you build interactive user journeys and share them with others. You can preview interactions and iterate on ideas rapidly.
Early Validation
A prototype simulates the final product and helps you to test and validate ideas before development. Testing with users highlights pain points and improves the experience.
Real‑time Collaboration
Figma’s browser‑based platform lets teammates collaborate in real time, regardless of operating system. Designers and developers see each other’s work and avoid design drift.
Efficient Iteration
Working in Figma saves you time and reduces stress. The tool makes the design process quick and fun, and design leads can correct misinterpretations early.
Engaging Communication
You can share prototypes securely with stakeholders through permission‑based links and live updates. Interactive prototypes improve client engagement, cut costs, and visualize user flows
Professional Tips to Improve Your Prototyping Workflow in Figma
You can streamline your workflow by adopting smart techniques. Here are several tips to build prototypes faster and more effectively —
Master Components
Convert recurring navigation elements into master components early. Link the menu items in the master component to their target screens. Every instance will inherit those links to save you from repetitive wiring.
Scroll Management
For long screens, Figma makes the frame scrollable when content exceeds the viewport. To preview what’s visible at first glance, turn the scrolling content into a component, set constraints, and enable clip content.
Pick the overflow direction, and size an instance to match the viewport.
Timed Delays and Overlays
Smooth abrupt interactions by adding an “after delay” trigger. Pair it with overlays so that a button press displays a brief loading screen and success message before proceeding.
Table of contents
Add a table of contents frame at the start of your prototype. Link each entry to a different user flow, allowing reviewers to easily jump between flows using a single link.
Observation Mode
Use Figma’s observation mode to follow collaborators or test participants in real time. Click their avatar to see exactly where they are in the prototype and how they interact.
In Closing
Prototypes in Figma convert static designs into interactive journeys connecting frames and flows. You create frames, toggle to prototype mode, set flows, connect hotspots, and add interactions.
Manage scrolling and interactive components, then preview and share. For smoother tests, compress images and trim excess content.
Set expectations with testers, add checkpoints, and use Smart Animate sparingly. If you’re ready to transform your vision into a smooth digital experience, partner with Codermoon.
Our team designs high-performance, custom websites with precision and creativity. Let’s build something extraordinary together.
Frequently Asked Questions
Q: How do I share a Figma prototype with clients or teammates who don’t use Figma?
Click Present, then Share prototype to generate a link. You can send that link or embed it on a website. Assign Viewer or Editor roles to control access.
Q: Can Figma prototypes accept typed input in forms?
Figma prototypes can’t store or manipulate real data like text. Interactive components only swap variants to mimic typing. You can simulate input using component states, but you can’t collect actual text.
Q: How should I prepare my prototype for user testing?
Reduce file size because large prototypes load slowly. Duplicate your file and remove unneeded frames, images, and assets. Compress images and use Smart Animate sparingly to improve performance.
Q: How do I test prototypes across desktop and mobile devices?
In presentation settings, choose Fit width for desktop prototypes and Fit to screen for mobile. Deselect Show hotspot hints to create a natural experience. Share the link and open it on your device


.webp)
.webp)


.svg)


